
Buenas a tod@s,
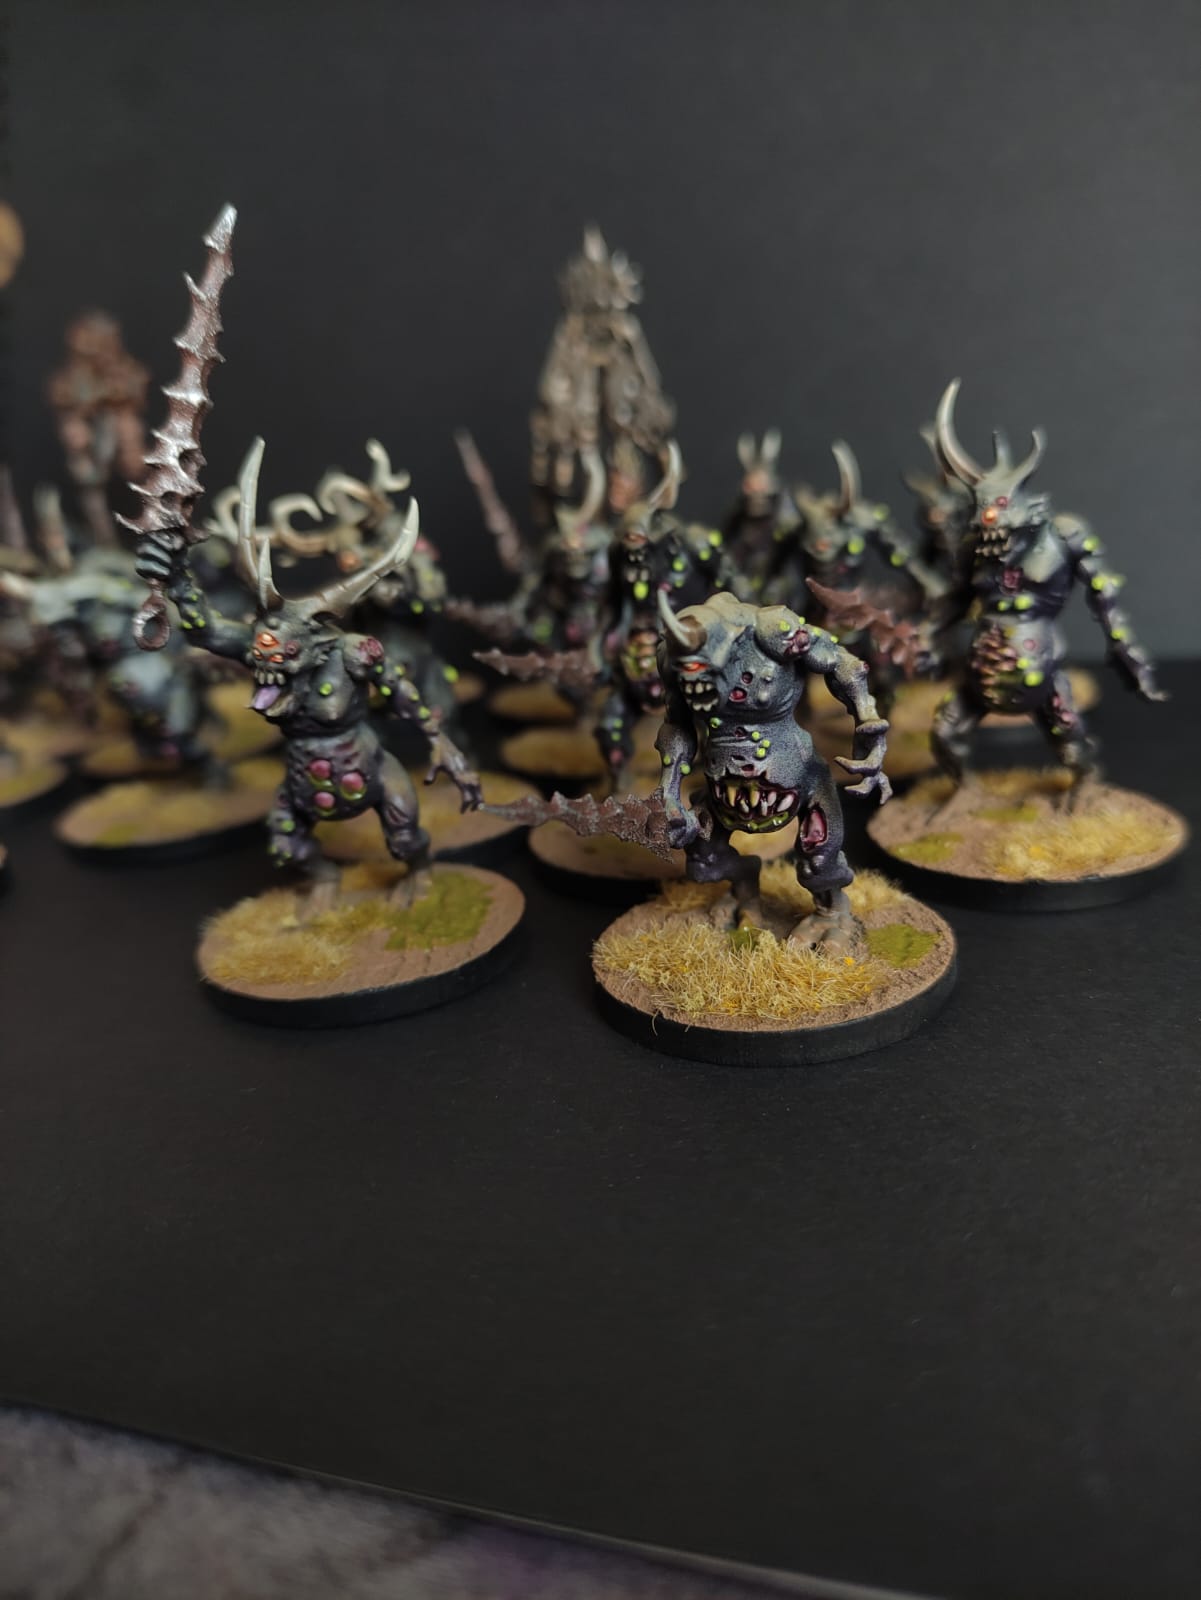
Hoy os traigo unos portadores de plaga de Nurgle de la marca Games Workshop (no nos vamos a engañar, casi todo lo que pinto es de ellos o 3D).
Siguiendo con la escalada de El peón y el Rey para 2023 escogí estas miniaturas para poder utilizarlas en varios juegos como W40K, Age of Sigmar, Kings of War (con unas bases cuadradas metalizadas que ya os mostraré más adelante) y seguro que en alguno más que se me escapa.
Con estas 20 miniaturas quiero ocupar los retos "ÉRAMOS MUCHOS" y "LA CAJA" de la escalada, sinceramente no tengo apenas cajas sin abrir y demasiadas minis como para comprar más jejeje, espero me perdonen por colarlos así.
El pintado lleva una base de aerógrafo y luego el resto a pincel, como siempre pintado con un nivel para jugar resultón y sencillo.
Os dejo los pasos a continuación:
1. Imprimación negra con aerógrafo.
2. Pre sombreado en color hueso con aerógrafo.
3. Sombra desde abajo morada con aerógrafo.
4. Filtro a toda la miniatura con tinta/shade de GW sepia con aerógrafo.
5. Zonas de piel abiertas con hueso y cuando seque tinta/shade de GW rojo.
6. Pústulas en amarillo verdoso y algunos otros huecos con tinta/shade rojo.
7. Ojos con hueso, lavado de naranja flúor y punto en amarillo hielo.
8. Cuernos en hueso, lavado de agrax GW de mitad para abajo y perfilado en hueso al secar.
9. Espadas con metalizado, corrosión typhus, pincel seco de naranja y pincel seco de cromo.
10. Detalles del músico y estandarte a elegir (metales, óxidos, lavados, etc...)
11. Peana con textura de vallejo, tierra marrón con aerógrafo, borde de peana en negro.
12. Capa de barniz brillante con aerógrafo, dejamos secar y después una de barniz mate.
13. Finalmente, cola transparente para poner césped/matojos y pegotes de pintura técnica Nurgles Rot de GW tanto en las tripas como por la peana.
Os dejo unas fotos, espero que os gusten. Al final podéis ver el avance en el contrato de pintura XD.
Un abrazo, nos leemos en los comentarios (no dudéis en comentar e inscribiros al BLOG si os gusta el contenido.
Good to all,
Today I bring you some Nurgle plague carriers from Games Workshop (we're not going to fool ourselves, almost everything I paint is theirs or 3D).
Continuing with the escalation of The Pawn and the King for 2023, I chose these miniatures to be able to use them in various games such as W40K, Age of Sigmar, Kings of War (with metallic square bases that I will show you later) and surely in some others. that escapes me With these 20 miniatures I want to take on the "WE WERE MANY" and "THE BOX" challenges of climbing, honestly I hardly have any unopened boxes and too many minis to buy more hehehe, I hope you'll forgive me for sneaking them in like this.
The painting has an airbrush base and then the rest with a brush, as always painted with a simple and resultant level to play with. I leave you the steps below:
1. Airbrush Black Primer.
2. Pre-shading in bone color with an airbrush.
3. Shadow from below purple with an airbrush.
4. Filter the whole miniature with ink/shade of sepia GW with airbrush.
5. Open skin areas with bone and red GW ink/shade when dry.
6. Yellow-green pustules and some other holes with red tint/shade.
7. Eyes with bone, fluorescent orange wash and ice yellow point.
8. Horns in bone, washing of agrax GW from the middle down and outlined in bone when dry.
9. Swords with metallic, typhus corrosion, orange drybrush and chrome drybrush.
10. Details of the musician and banner to choose from (metals, oxides, washes, etc...).
11. Vallejo textured base, airbrushed brown earth, base border in black.
12. Layer of glossy varnish with an airbrush, let it dry and then one of matt varnish.
13. Finally, transparent glue to put grass/bushes and globs of Nurgles Rot technical paint from GW both on the guts and on the base.
I leave you some photos, I hope you like them. At the end you can see the progress in the painting contract XD.
A hug, we read each other in the comments (do not hesitate to comment and subscribe to the BLOG if you like the content.


Muy buen resultado y muy buen paso a paso.
ResponderEliminarDe colarlos nada. Una caja y 20 miniaturas cumplen de sobra ambos retos.
Da gusto ver cómo tirais de la escalada. Nadie para de producir.
Tengo ganas de ver lo de las peanas.
Enhorabuena por los demonios y un saludo.
Muchas gracias, tener una planificación para pintar como la escalada ayuda mucho a progresar y no estancarse por desmotivación. Un fuerte abrazo y nos vamos leyendo.
EliminarPD: si te ha gustado el paso a paso tengo uno más detallado de un bicho gordo... pero no es lo que crees... o si? Misterio... XD