viernes, 17 de marzo de 2023

Gran demonio de Nurgle (WIP)


Buenas a tod@s,

Hoy os traigo un tutorial de los primeros pasos para pintar la base mediante aerógrafo para una Gran Inmundicia de Warhammer 40.000, Age of Sigmar, Grimdark Future, o cualquier otro juego donde encaje esta figura (básicamente un gran demonio de Nurgle para poder utilizar en varios juegos como proxy, ya que es un modelo alternativo 3D).

Sigue la estela de la escalada de pintura de nuestro blog amigo El Peón y el Rey, ya veré donde encaja dentro de la planificación.

El sistema seguido es exactamente el mismo que utilicé en los portadores de plaga de Nurgle, solo que esta vez os dejo fotos del proceso y de nuevo un breve resumen de esta base para pintar.

Good to all,

Today I bring you a tutorial of the first steps to paint the base with an airbrush for a Great Uncleanness from Warhammer 40,000, Age of Sigmar, Grimdark Future, or any other game where this figure fits (basically a great demon of Nurgle to be able to use in various games as a proxy, since it is an alternative 3D model).

Follow the trail of the painting escalation of our friendly blog El Peón y el Rey, I'll see where it fits into the planning.

The system followed is exactly the same as the one I used in the Nurgle plague carriers, only this time I leave you photos of the process and again a brief summary of this base to paint.

1. Imprimación negra con aerógrafo.

1. Airbrush Black Primer.


2. Pre sombreado en color hueso con aerógrafo.

3. Sombra desde abajo morada con aerógrafo.

2. Pre-shading in bone color with an airbrush.

3. Shadow from below purple with an airbrush.


4. Filtro a toda la miniatura con tinta/shade de GW sepia con aerógrafo.

4. Filter the whole miniature with ink/shade of sepia GW with airbrush.


Espero que os haya gustado y os sirva de ayuda. Un saludo.

I hope you liked it and it helps you. See you soon.


jueves, 9 de marzo de 2023

Portadores de plaga

Buenas a tod@s,

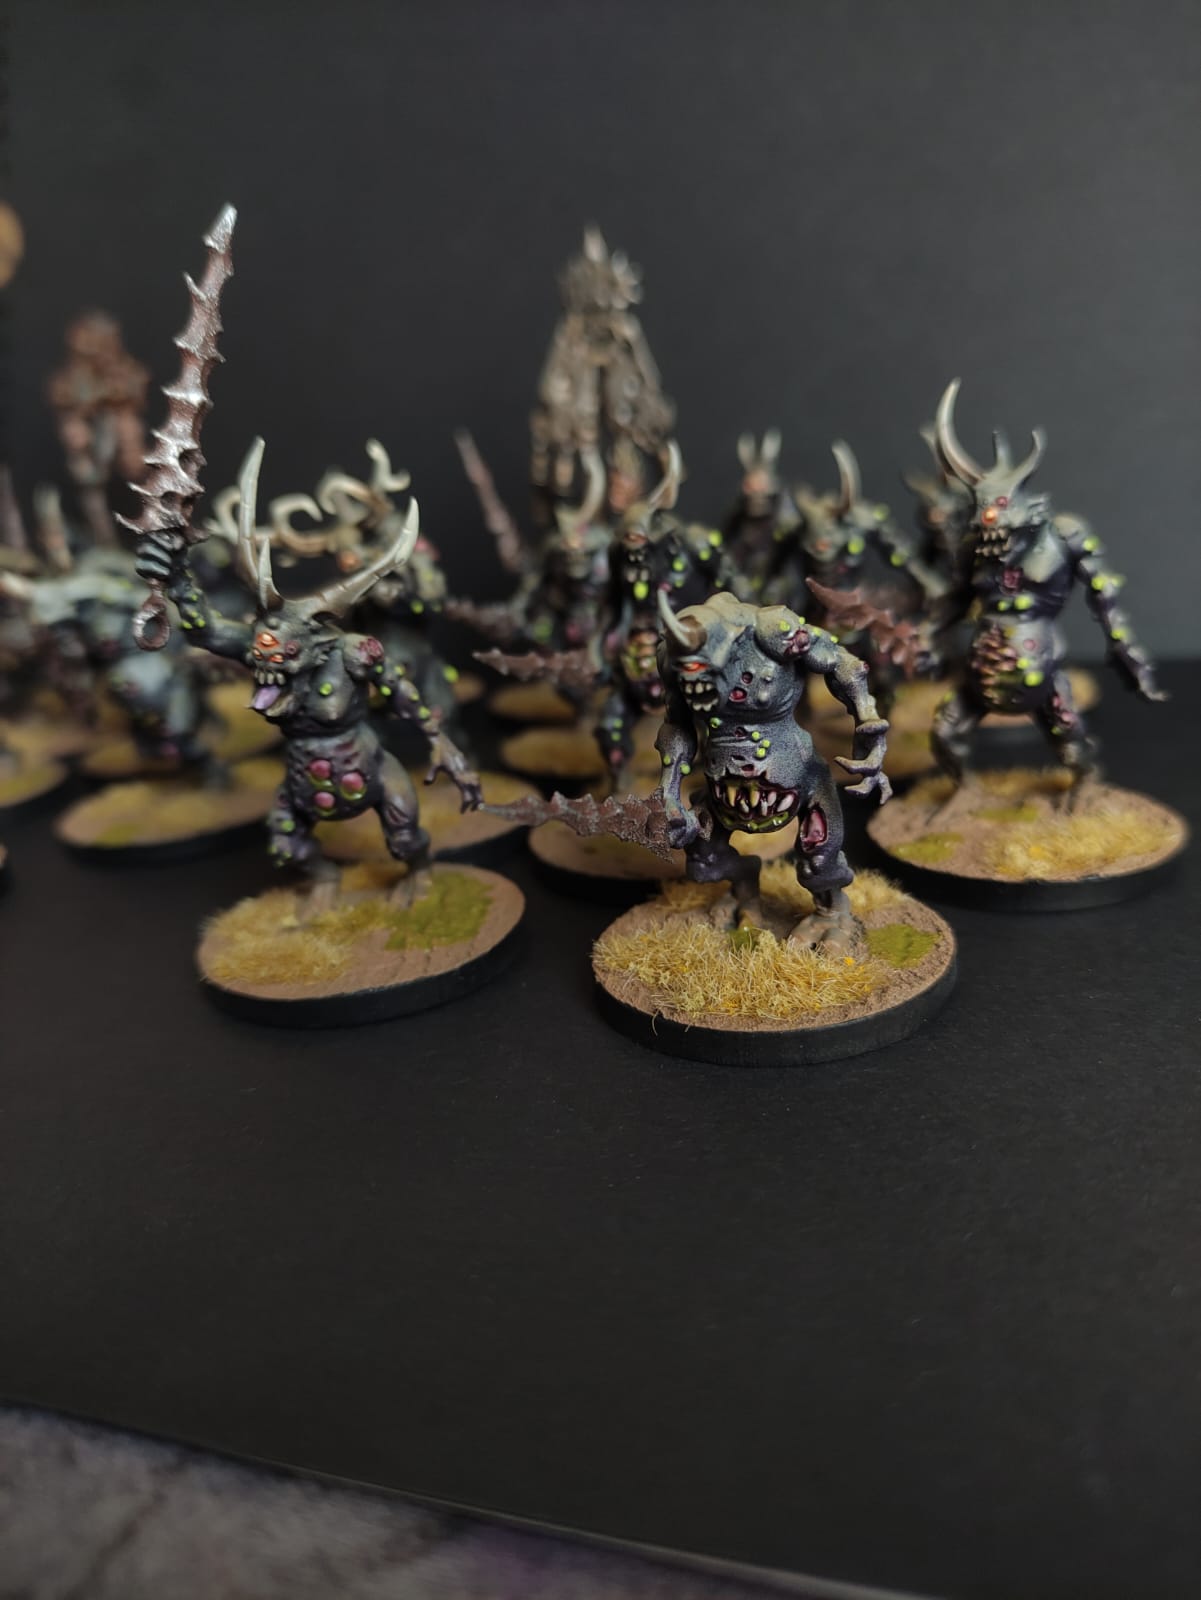
Hoy os traigo unos portadores de plaga de Nurgle de la marca Games Workshop (no nos vamos a engañar, casi todo lo que pinto es de ellos o 3D).

Siguiendo con la escalada de El peón y el Rey para 2023 escogí estas miniaturas para poder utilizarlas en varios juegos como W40K, Age of Sigmar, Kings of War (con unas bases cuadradas metalizadas que ya os mostraré más adelante) y seguro que en alguno más que se me escapa.

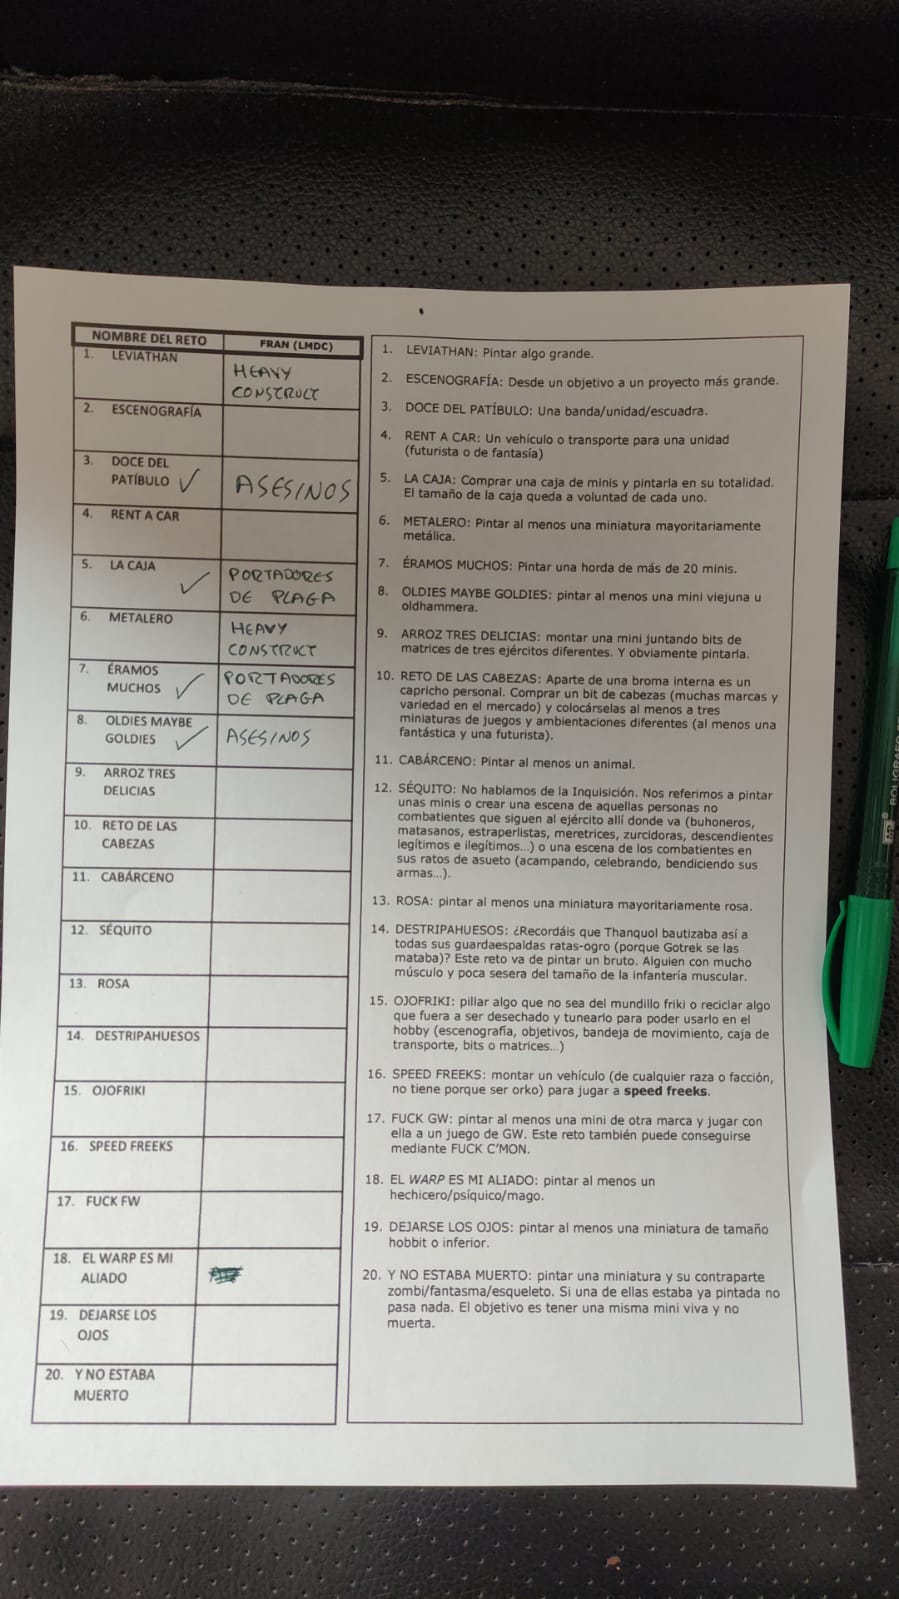
Con estas 20 miniaturas quiero ocupar los retos "ÉRAMOS MUCHOS" y "LA CAJA" de la escalada, sinceramente no tengo apenas cajas sin abrir y demasiadas minis como para comprar más jejeje, espero me perdonen por colarlos así.

El pintado lleva una base de aerógrafo y luego el resto a pincel, como siempre pintado con un nivel para jugar resultón y sencillo.

Os dejo los pasos a continuación:

1. Imprimación negra con aerógrafo.

2. Pre sombreado en color hueso con aerógrafo.

3. Sombra desde abajo morada con aerógrafo.

4. Filtro a toda la miniatura con tinta/shade de GW sepia con aerógrafo.

5. Zonas de piel abiertas con hueso y cuando seque tinta/shade de GW rojo.

6. Pústulas en amarillo verdoso y algunos otros huecos con tinta/shade rojo.

7. Ojos con hueso, lavado de naranja flúor y punto en amarillo hielo.

8. Cuernos en hueso, lavado de agrax GW de mitad para abajo y perfilado en hueso al secar.

9. Espadas con metalizado, corrosión typhus, pincel seco de naranja y pincel seco de cromo.

10. Detalles del músico y estandarte a elegir (metales, óxidos, lavados, etc...)

11. Peana con textura de vallejo, tierra marrón con aerógrafo,  borde de peana en negro.

12. Capa de barniz brillante con aerógrafo, dejamos secar y después una de barniz mate.

13. Finalmente, cola transparente para poner césped/matojos y pegotes de pintura técnica Nurgles Rot de GW tanto en las tripas como por la peana.

Os dejo unas fotos, espero que os gusten. Al final podéis ver el avance en el contrato de pintura XD.

Un abrazo, nos leemos en los comentarios (no dudéis en comentar e inscribiros al BLOG si os gusta el contenido.


Good to all,

Today I bring you some Nurgle plague carriers from Games Workshop (we're not going to fool ourselves, almost everything I paint is theirs or 3D).

Continuing with the escalation of The Pawn and the King for 2023, I chose these miniatures to be able to use them in various games such as W40K, Age of Sigmar, Kings of War (with metallic square bases that I will show you later) and surely in some others. that escapes me With these 20 miniatures I want to take on the "WE WERE MANY" and "THE BOX" challenges of climbing, honestly I hardly have any unopened boxes and too many minis to buy more hehehe, I hope you'll forgive me for sneaking them in like this.

The painting has an airbrush base and then the rest with a brush, as always painted with a simple and resultant level to play with. I leave you the steps below:

1. Airbrush Black Primer.

2. Pre-shading in bone color with an airbrush.

3. Shadow from below purple with an airbrush.

4. Filter the whole miniature with ink/shade of sepia GW with airbrush.

5. Open skin areas with bone and red GW ink/shade when dry.

6. Yellow-green pustules and some other holes with red tint/shade.

7. Eyes with bone, fluorescent orange wash and ice yellow point.

8. Horns in bone, washing of agrax GW from the middle down and outlined in bone when dry.

9. Swords with metallic, typhus corrosion, orange drybrush and chrome drybrush.

10. Details of the musician and banner to choose from (metals, oxides, washes, etc...).

11. Vallejo textured base, airbrushed brown earth, base border in black.

12. Layer of glossy varnish with an airbrush, let it dry and then one of matt varnish.

13. Finally, transparent glue to put grass/bushes and globs of Nurgles Rot technical paint from GW both on the guts and on the base.

I leave you some photos, I hope you like them. At the end you can see the progress in the painting contract XD.

A hug, we read each other in the comments (do not hesitate to comment and subscribe to the BLOG if you like the content.




viernes, 24 de febrero de 2023

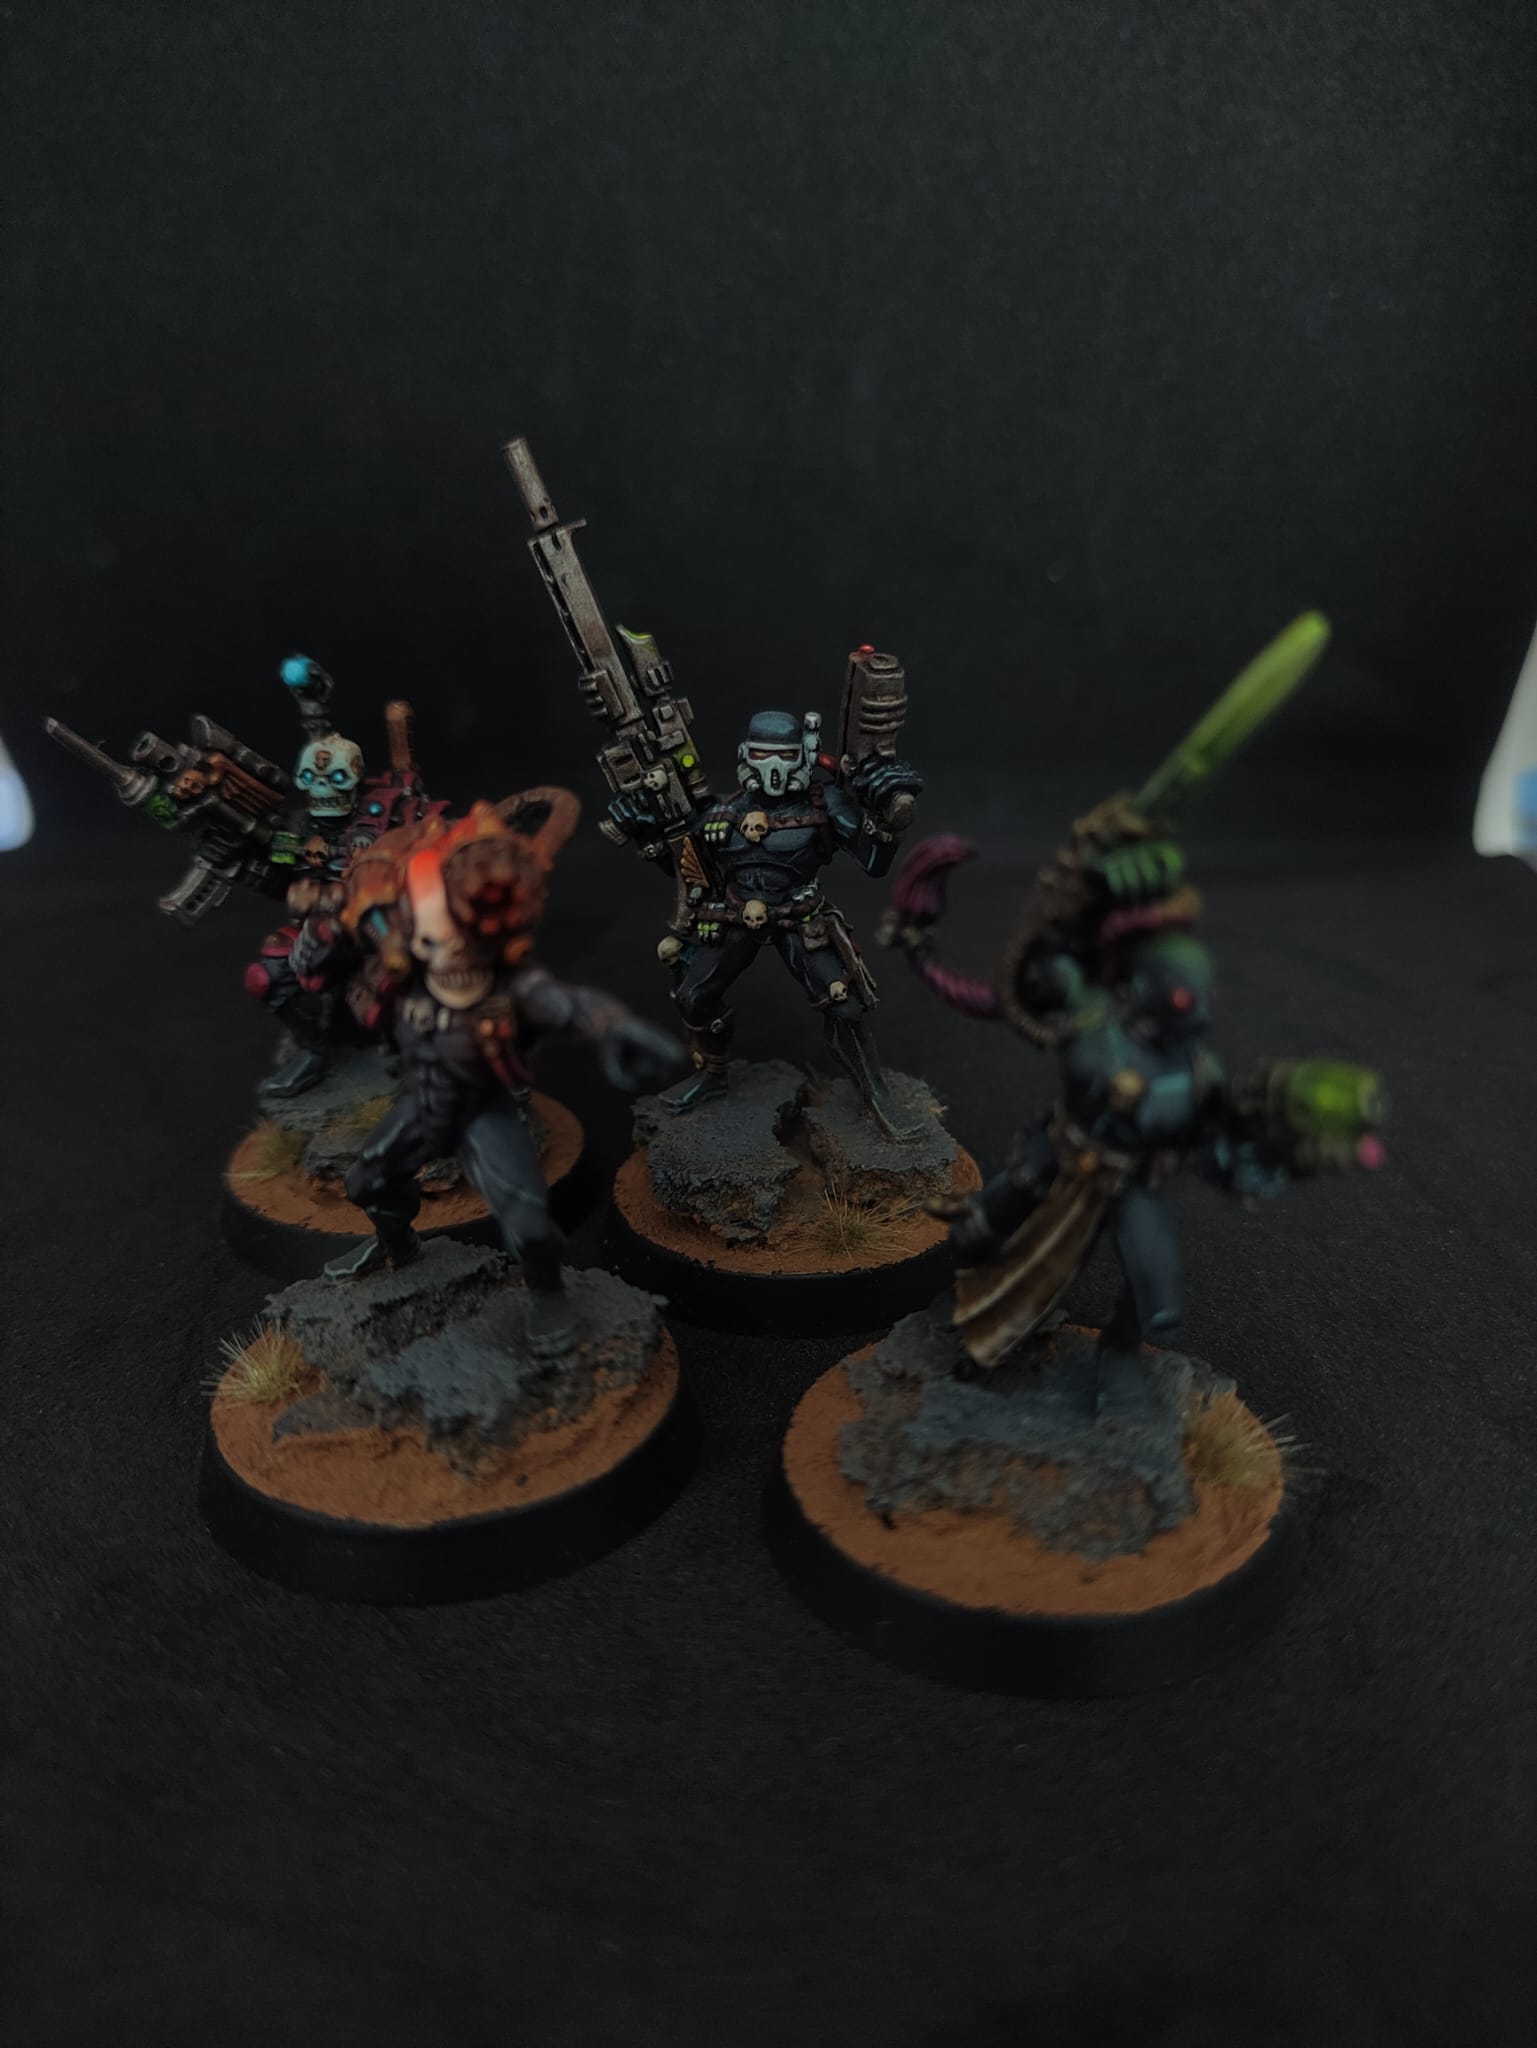
W40K - ASESINOS DE METAL

Buenas a tod@s,

Retomando una vieja costumbre del BLOG me he unido a la escalada de pintura para este 2023 de nuestros amigos de El Peón y el Rey. Nada motiva más que compartir un hobby con gente apasionada como tu, os animo a pasaros por su BLOG y comentar.

Hoy os traigo unas miniaturas antiguas de metal, los asesinos de warhammer 40.000 a los que les tenía muchas ganas desde hace tiempo. He aprovechado para matar dos pájaros de un tiro en la escalada: DOCE DEL PATÍBULO y OLDIES MAYBE GOLDIES. No es una unidad, escuadra o banda en si, pero al haberlos pintado casi como si lo fueran, y que tengo muchas ganas de jugarlos juntos a ver de que son capaces juntos...

Good to all, Resuming an old BLOG custom, I have joined the painting climb for this 2023 of our friends from El Peón y el Rey. Nothing motivates more than sharing a hobby with passionate people like you, I encourage you to visit his BLOG and comment. Today I bring you some old metal miniatures, the warhammer 40,000 assassins that I really wanted for a long time. I have taken the opportunity to kill two birds with one stone in the climb: GARDEN TWELVE and OLDIES MAYBE GOLDIES. It's not a unit, squad or band itself, but I really want to play them together to see what they are capable of.


Además, os dejo con una foto al final de lo que se avecina para esta escalada, hay que pintar algo grande y no será por trastos grandes.

Un saludo, nos leemos pronto.

Also, I leave you with a photo at the end of what is coming for this climb, you have to paint something big and it won't be because of big junk... Greetings, see you soon.


miércoles, 8 de febrero de 2023

W40K - Dreadnoughts contemptor de los Mil Hijos

Buenas a tod@s,

Hoy os traigo unos Dreadnought Contemptor de los Mil Hijos. Un gran amigo me imprimió en 3D estas dos miniaturas a cambio de que le fabricara unos marcadores transparentes (podéis ver el tutorial en este enlace si os queréis hacer unos vosotros mismos).

Hi all!

Today I bring you some Dreadnought Contemptor of the Thousand Sons. A great friend 3D printed these two miniatures for me in exchange for him making him some transparent markers (you can see the tutorial at this link if you want to make your own).


Para estos bípedos de Warhammer 40.000 utilicé aerógrafo y varias otras técnicas que he ido aprendiendo como los daños de batalla con esponja.

Os voy a intentar dejar un breve resumen del proceso y después las fotos, si tenéis cualquier duda no dudéis en comentar, aunque sea para criticar lo mal que pinto XD.

For these Warhammer 40,000 bipeds I used airbrushing and various other techniques I've been learning like sponge battle damage.

I'm going to try to give you a brief summary of the process and then the photos, if you have any questions, don't hesitate to comment, even if it's to criticize how badly I paint XD.

1. Pre sombreado con aerógrafo (imprimación negra y blanco para volumen).

1. Pre-shaded with an airbrush (black primer and white for volume).


2. Capa base fina con aerógrafo de verde gris medio de Vallejo (el código de la pintura es70.973).

2. Vallejo Medium Gray Green Airbrush Thin Basecoat (Paint Code is 70.973).

3. Capa fina con aerógrafo de Nihilakh Oxide de Games Workshop (según lo saturado que queráis el acabado dar una o dos capas, siempre finas).

3. Thin coat with an airbrush of Nihilakh Oxide from Games Workshop (depending on how saturated you want the finish to be, give one or two coats, always thin).


4. De segundo color como contraste a pincel Retributor Armour de Games Workshop (sombreado posteriormente con Agrax Earthshade de Games Workshop también).

4. Second color as a contrast to Games Workshop's Retributor Armor brush (later shaded with Games Workshop's Agrax Earthshade as well).

5. Las partes metálicas están pintadas con el típico color metalizado bólter, vale cualquier marca evidentemente, y después aplico un lavado de Agrax también.

5. The metal parts are painted with the typical bolter metallic color, obviously any brand is fine, and then I apply an Agrax wash as well.


6. Detalles de la cabeza en amarillo y perfilados mezclando el color predominante verde gris medio de Vallejo con blanco.

6. Details of the head in yellow and outlined by mixing Vallejo's predominant medium gray green color with white.

7. Los daños de batalla están pintados mediante la técnica de la esponja con un marrón muy oscuro (casi negro) y encima un metalizado cromado.

7. The battle damage is sponge painted with a very dark brown (almost black) and a chrome metallic on top.

8. Los efectos de las armas realizadas con aerógrafo tipo OSL (object source lighting) que es el efecto de iluminación que da de fuente un objeto por explicarlo de alguna manera. Pintas el color base (azul por ejemplo) y vas aclarando en función del efecto que quieras obtener, si me lo pedís en comentarios hago un tutorial detallado pero seguro encontraréis muchos ya.

8. The effects of weapons made with an airbrush type OSL (object source lighting) which is the lighting effect that an object gives from a source to explain it in some way. You paint the base color (blue for example) and lighten depending on the effect you want to obtain. If you ask me in the comments, I'll do a detailed tutorial but I'm sure you'll find many already.


9. Para terminar en la peana apliqué textura de vallejo, en este caros tierra oscura (código 26.218) y encima con aerógrafo para dar efecto polvo y un contraste marrón rojizo de vallejo gama model air (aprovechando que lo tengo para no tener que diluir tanto).

9. To finish on the base I applied a vallejo texture, on this caros dark earth (code 26.218) and on top with an airbrush to give a dusty effect and a reddish brown contrast from vallejo model air range (taking advantage of the fact that I have it so I don't have to dilute as much ).


10. El remate final fueron dos tipos de césped que compré en unas Freak Wars hace mucho tiempo a Pablo el Marqués y por fin tenía excusa para usarlas (aunque creo que las estrené con Magnus el Rojo).

10. The final shot were two types of grass that I bought in some Freak Wars a long time ago from Pablo the Marquis and I finally had an excuse to use them (although I think I debuted them with Magnus the Red).


Espero que os haya gustado, os sirva de ayuda y os anime a pintar. Os leo en los comentarios, un saludo.

I hope you liked it, it helps you and encourages you to paint. I read you in the comments, greetings.


viernes, 24 de junio de 2022

W40K - Tutorial marcadores de objetivo transparentes

Buenas a tod@s,

Después de una larga ausencia, espero que casual, os traigo un tutorial que creo os será de agrado.

Se trata de como fabricar nuestros propios marcadores de objetivo para el juego Warhammer 40.000 (novena edición) transparentes y personalizados al gusto.

Materiales básicos necesarios: 6 láminas de acetato transparentes (se utiliza para encuadernar), rotulador permanente, compás, regla para medir y tijeras. Después si queremos hacer filigranas necesitaremos más materiales como pinturas, plantillas, etc.

Pasos:

1. En el centro de cada lámina de acetato marcamos con el compás y el rotulador un círculo de 2cm de radio.

2. Aumentamos el radio del compás para marcar otro círculo de 9,6cm de radio (es la suma de los 2cm de radio del objetivo más el aura de 3 pulgadas alrededor de él, para indicar que se está controlando).

3. Cortamos con la tijera con cuidad, por fuera del círculo más grande dejando visible la línea que hemos marcado al hacerlo.

4. Ya estaría terminado, a partir de aquí depende de cada uno si quiere pintar, numerar o hacer cualquier adaptación.

Personalmente he realizado dos sets de marcadores, unos sencillos numerados y otros personalizados pintados con el logotipo del caos. Si los pintas prepara una plantilla y barniza después para evitar que la pintura salte y utiliza si es posible un aerógrafo para un acabado más fino.

Espero que os haya gustado el tutorial, espero vuestros comentarios y no olvidéis pasaros por Instagram a visitarnos.


Hi everyone,

After a long absence, I hope it's casual, I bring you a tutorial that I think you will like.

It is about how to make our own objective markers for the game Warhammer 40,000 transparent and personalized to taste.

Basic materials needed: 6 transparent acetate sheets (used for binding), permanent marker, compass, ruler and scissors. Later, if we want to make watermarks, we will need more materials such as paints, templates, etc.

Steps:

1. In the center of each acetate sheet, mark a circle with a radius of 2cm with a compass and a marker.

2. We increased the radius of the compass to mark another circle with a radius of 9.6cm (this is the sum of the 2cm radius of the target plus the 3-inch aura around it, to indicate that it is being controlled).

3. Cut with scissors carefully, outside the largest circle, leaving visible the line that we have marked when doing so.

4. It would already be finished, from here it is up to each one if they want to paint, number or make any adaptation.

I have personally made two sets of bookmarks, some numbered simple ones and others personalized painted with the chaos logo. If you paint them, prepare a template and varnish afterwards to prevent the paint from skipping and use an airbrush if possible for a finer finish.

I hope you liked the tutorial, I await your comments and do not forget to stop by Instagram to visit us.


jueves, 13 de mayo de 2021

W40K - PARTIDA 2vs1 (AO & NEC vs NIDS)

Buenas a tod@s,

El pasado sábado jugamos una partida en la asociación que enfrentó una alianza de Ángeles Oscuros (Roberto) y Necrones (los míos) contra Tiránidos (Raúl). Una alianza extraña pero necesaria para emparejar un compañero que se había quedado sin oponente.

Nos divertimos mucho, por mi parte estoy encantado de retomar un poco los dados y dejar los pinceles, que por motivos personales no me da el tiempo para demasiado.

La partida estuvo reñida en cierta medida, empezaron los tiránidos tomando posiciones pero el turno uno de la alianza fue duro para los Tiránidos, recibieron dos bajas importantes en una fase de disparo marcada por la suerte en las tiradas. El resto de la partida se le hizo cuesta arriba al enjambre, pero plantaron cara hasta el final, que derivó en una victoria de la alianza sobre los Tiránidos.

Espero os haya gustado este breve informe, os dejo unas fotos, se agradecen los comentarios, os traeremos más mini-informes de batalla.

Un saludo.

Good morning everyone,

Last Saturday we played a game in the association that faced an alliance of Dark Angels (Roberto) and Necrones (mine) against Tyranids (Raúl). A strange but necessary alliance to match a partner who had run out of opponent.

We had a lot of fun, for my part I am delighted to take up the dice a bit and put down the brushes, which for personal reasons does not give me time for too much.

The game was quite close, the tyranids began taking positions but the turn of the alliance was hard for the Tyranids, they received two important casualties in a shooting phase marked by luck in the rolls. The rest of the game was uphill for the swarm, but they stood up to the end. Alliance victory over the Tyranids.

I hope you liked this brief report, I leave you some photos, comments are appreciated, we will bring you more mini-battle reports.

All the best. 


jueves, 25 de marzo de 2021

PINTURA - Tutorial de capa base sobre pre sombreado con aerógrafo

Buenas a tod@s,

Hoy os traigo un breve tutorial sobre como pinto de manera rápida, sencilla y eficaz sin ser un maestro con el aerógrafo ni mucho menos.

Generalmente los pasos que sigo son muy sencillos:

Good morning everyone,

Today I bring you a short tutorial on how I paint quickly, easily and effectively without being a master with the airbrush, much less.

Generally the steps that I follow are very simple: 

1. Imprimación negra (black primer)

2. Zonas de luz con blanco, dado varias capas sobre las zondas donde más luz quiera (white lights)


3. Color base diluido en su justa medida (base color)


4. Este paso es opcional, consiste en mezclar el color base utilizada con amarillo hielo o carne clara con una proporción del 50% y dar puntos de luz donde más intensidad queramos. Es bastante sutil pero se nota comparado con la capa base y proporciona mejor acabado y contraste (extra lights mixture):


Espero que os haya gustado y sobre todo servido de ayuda este tutorial (no dudéis en comentar dudas o peticiones de tutoriales en el futuro). Un saludo.

I hope you liked and above all this tutorial was helpful (do not hesitate to comment on questions or requests for tutorials in the future). All the best.